Down, down, down, up, up, up

So, I’ve been revisiting some works from last year, scraping through the bones and overpainting new body parts. This can go a little ‘frankenstein’, as did this piece, so I turned the monster to face the wall for a while… before I set fire to it!

Something I’ve been doing lately is to take a phone pic of the beast and printing it out small so I have a dodgy print on which to scribble and scrawl and resolve things at a smaller size. This piece is 91 x 91cm (36 x 36in) so it’s big, and too big to play around on at this point, it needs a surgery plan.

134_Downsize01Gouache and acrylic are slopped on here in a wrinkly mess, still around the zone colours I’ve been using, and it feels like I’ve got somewhere to go next time I face it.

Below is the current incarnation, and it’s been through a few non-working versions to get to this non-working version, but looking at it in small scale has been a good exercise (‘cos seriously, it’s rubbish up big!).

135_downsize02


Vote early, vote often

Actually, I think you can only vote once. Hah. But if you’re interested, all of the entries in the Qld Regional Art Awards are online now and you can vote for your favourite.

This is the same Award where Christine’s beautiful image took out last years Digital Award and won her the residency in Brisbane. And her piece is part of the show touring Queensland this year.

Voting is open for 2 weeks. I will bring you cake if you vote :-]

But even for a flick through some of our regional talent go to: http://www.flyingarts.org.au/QRAA-2014-Vital-Signs-ga3220.html

New impasto medium for oils

133_AW

I’ve never used a medium to thicken oils before (I know, I know, should be trying wax). But they make me a bit nervous. I worry, in a slightly hand-wringing way, that I’ll get it all pear shaped and crazy crazy crazing will erupt… worse still… after it’s left the studio. My textures in the past have just been oils with drying mediums in them and then they sit and dry… for some time.

So, recently I bought some impasto medium (Langridge) with a drying medium in it and it’s quite interesting to use and perfect for this new commission that I’d like to complete in less than a decade. Sadly, it does seem to dry on the top after you’ve opened the jar, so it feels like I had to waste a bit from the jar on the 2nd use but I was really impressed with how quickly it feels dry. But I still cautiously go pretty ‘fat’ when I’m painting over the textured areas as the reality is that it’s not fully dried. (hand wringing)

132_AW


130_AWI bit of preparatory sketching has happened, drawing on old images and sketches from a time amongst some spotted gums at Bundanon, phew, 8 years ago. And somewhere in there will be some references to Sydney Blue Gums as the Commissioners are from that lovely part of the world.

It’s another nice big piece and should keep me out of trouble for a while, except when I’m in trouble on the actual painting! I expect that’s when I’ll face the print filing. More gouache sketching to happen too as my first few were terribly unbrave and awkward.

131_AW

Archival Survival

About 400 years ago I gave away a set of plan drawers. So huge and heavy and cumbersome, no space to store them at the time, and I just seem to lose papers in them rather than use them well.

Phhhhfffff. Little did I know I’d dance on the edges of printmaking 25 years later and discover a storage and filing problem. After going through a large box of prints last year to find artworks, over and over and over again (sometimes it takes a while for the light bulb to click on) I realised I needed a better system and so mused for some more months on having an existing cabinet of drawers remodelled with thinner drawers for prints. I mean, let’s not rush into these things.

And that ended up paying off as I decided to go looking for a more low cost option and found a variety of different sized flat archival boxes that were acid free and easy to order, deliver and assemble. Next step is to stare at the pile of boxes for a few more months and then take a deep breath and pull out the big box of prints and start sorting. And the archival boxes will fit within the cabinet of drawers. Yay.

For the Orstraylians: www.archivalsurvival.com.au (love that name)

129_AW

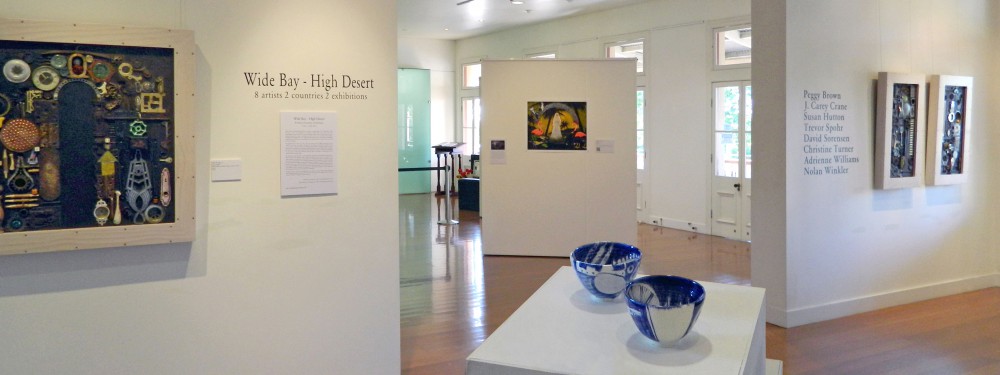
High Desert to Wide Bay

August


Greetings Friends. My Wife Heather will shortly begin a great career opportunity in Maryland.

I will stay on here in New Mexico to wrap things up, but expect to join her no later than next spring. Our time in Las Cruces influenced my active return to painting and this High Desert river valley has been my partner in pallette and imagery. Thanks for the opportunity to collaborate with you all on Wide Bay, High Desert, Part I. Thanks especially to Catherine at the Unsettled Gallery for her encouragement and support.

So – the picture above was made during the last few weeks of waiting to find out if we might be relocating to the Wide Chesapeake Bay. 20″ square, acrylic and drawing with touches of collage and spray paint. I think that it looks pretty optimistic.

Formally it is based on about one 15th of another recent painting, detail here:

DetailIt is one of my “Cel” paintings, meaning that it reminds me of a cell from a cartoon animation. Not much mystery perhaps, but I sometimes like the avenue of sharp, clear construction.

Still around here for a while, but seemed like a good time to say thanks. CC


New appreciation for bark painters

On my trip to Oz last year, I collected an antique Aboriginal carved baobab nut.  It doesn’t display well just lying there, so I’ve wanted to find or make a small stand to hold it upright.  Yesterday I finally got the mojo working enough to give it a burl.  I decided it would be kinda cool to try my hand at using natural ochre rock pigments (that I’ve been collecting on my hikes around Las Cruces) and painting a la Aboriginal or cave painting style.  Weellll easier thunk than done, but I somehow created something functional out of the process, and learned a lot (mostly awe and respect) about just how good the Aboriginal artists were/are working on bark with limited bush materials.

I created a template from foam board to get a set of interlocking shapes that would hold up the baobab nut, then tore apart a cedar cigar box that I brought back from recent trip to Europe (for this very purpose).  Using an exacto knife I cut out the wood in the shapes (no simple task, and some gluing was necessary) and smoothed them up to provide my surfaces.  Next I ground up my rocks into different colored powders.  Quite time consuming, but it was fun to use my Native American metate grinding stones (I love functional antiques).  Research on the net didn’t help particularly with specifics on a suitable binding material, so for the base coat I mixed red pigment with gesso to create the surface for the painting.  Pinker than I’d like, but since it was all eventually covered with other pigment it didn’t matter.

grinding pigments-f

It took some pondering on what to paint.  I didn’t want to do a faux Aboriginal piece, so settled on a scene from my memories of time spent in my VW Kombi at Ayers Rock (now UIuru) in 1975.  I’d done an earlier painting in abstracted style that incorporated some Aboriginal rrark hatched lines, so decided to wing it with something like that as well for the sky.  I painted a sketch of the scene in watercolors as my reference.

sketch of stand-f painting sketch of stand-f

Using small brushes (I didn’t go the purist route with crushed twig-end brushes, thankfully–hard enough with store-bought ones!) I mixed mat acrylic gel, a little water, and my powdered pigments to make paint and did my miniature paintings on each side of the pieces of wood.  Not easy with detail work, as the pigment was rather grainy even after grinding away in the metate for a while.

In the end, I got something that more or less worked for me.  I even added footprints from the dog that accompanied our van, and a billy can for boiling tea.  I gave up with the brush and signed with a Sharpie to avoid just a big blob where my initials and date should be.  Here’s how final product looked.  It stands at 5″ wide x 3″ high (13 x 8 cm)

AR Memory stand-flat a sides-fAR Memory stand-flat b sides-f

AR Memory stand-angle2-f AR Memory stand-angle1-f

Boabab on stand-f Stand and Boabab on mantle-c